Improving My Productivity And Happiness With Things
For years now I’ve had my share of productivity apps that I used. From simple analog notebooks to Wunderlist, from RememberTheMilk to Things. I’ve tried them all. Things was the last one I tried and it stuck.
But this past year, it feels like I’ve not yet used Things to it’s fullest potential. This meant I had to put in extra work to make me work. Now I’ve refined the process to make Things work for me. If that makes sense.
Things
Things is a powerful todo application out of the box. It has the standard functionality that everyone expects from a good todo application. But it also contains much more like:
- Different views
- Area’s
- Projects
- Things URL
The downside is that this is only available on the Apple systems.
The Simple Way
What I started with was very simple. I created a few areas for that worked for me:
- SchabrechtsK
- Agilix
- Learning
- Blogging
- Vlogging
- Projects
Each of these contained projects depending on what the todos relate to. These were projects like general and financial. Except for Blogging, vlogging, and projects.
Under blogging, I had several projects. Each named after the categories I used. Within each project was a todo item per blog post. The same applied to the vlogging area. The project area contained all the projects that I worked on. This ranges from my website to client-related projects.
This meant I had to hunt down each of my todo’s. Whenever I had time left I needed to go through each of the todo’s and check what it is that I could do and if I wanted to do it. There was no sign of how big a todo was or how important it was.
The New Way
Things had to change, pun intended. I was spending too much time on finding the right todo’s that were important and would fit in the available time. So I started using more of the functionality that Things offered. I also optimized those that were already in place.
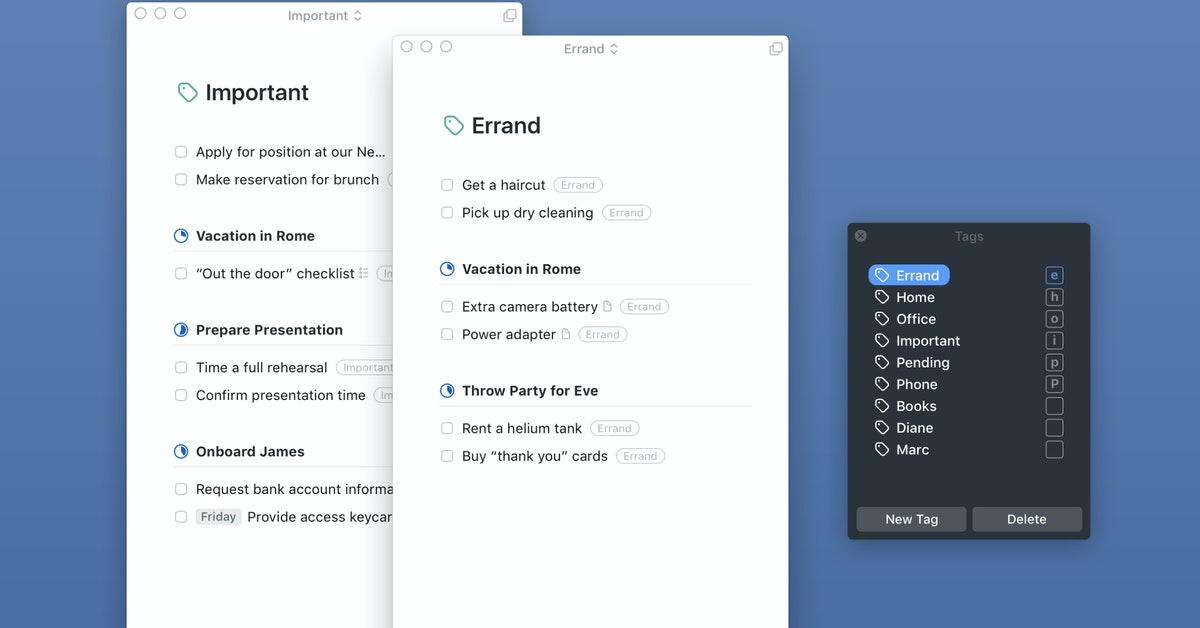
Tags
One of the first things I needed to use was the tags. I have experience with other todo apps. So, I know that you can overengineer the tagging system. I did not want to fall into that trap again. So I kept it simple.
The goal of the tags would be to solve my issue of finding the right todos. So, I needed a way to mark the importance of the todo and its size.
Simplicity is key, so I use the tags !!!, !! and ! for importance.
For size, I looked at scrum estimations. But Fibonacci numbers in tags is rough. So I went with what scrum advises to be the easier model to start with: T-shirt sizes. For now, I use the main 3 sizes S, M, L.
There is 1 more tag that I added, the Follow-up tag. Because some todos are for following-up with other people. The tag would add a way to find those as well.
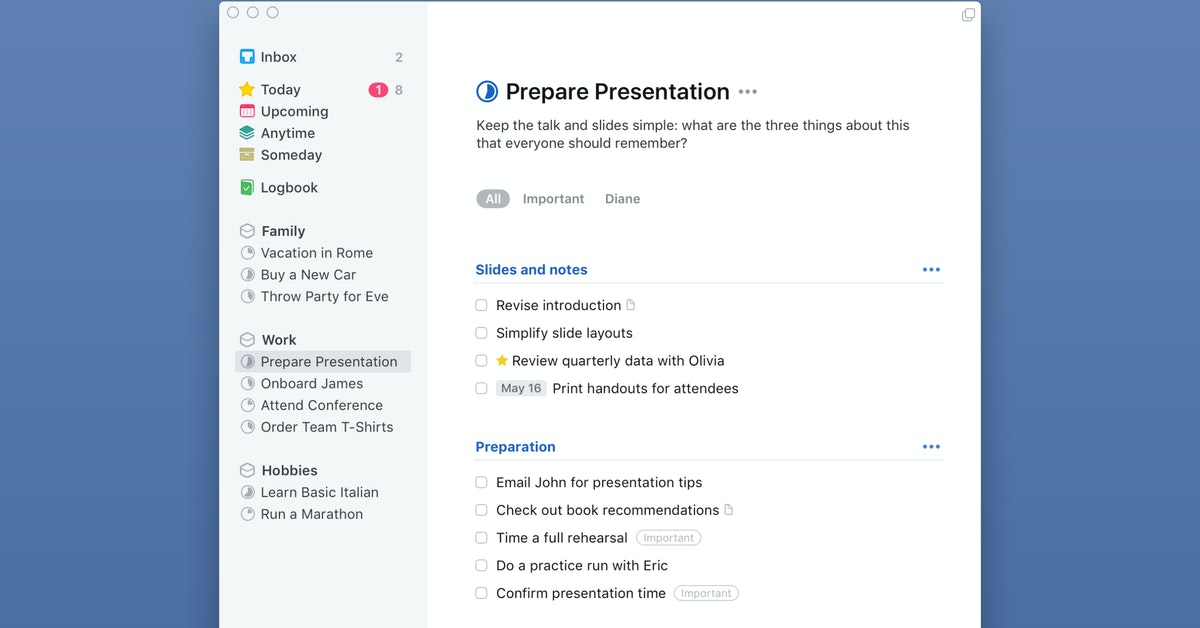
Area’s & Projects
Now that I had a way to tag my todo’s to see priority and size I needed to clean up the structure of my lists.
One of the mistakes I was making is that I was using projects to place todo’s that were neverending. A project like General or Finances would never end. Because I add todos to these at least every week to one of these. Never-ending projects are a big nono.
I made the same mistake to my Blogging and Vlogging areas.
So I redefined my areas. I now have a Personal area for all my personal todo’s about family, health, and household. A SchabrechtsK area for everything related to skills and personal business, think speaking, researching apps, …
Next, we have Agilix for all my business-related todo’s. And a Projects to keep track of (potential) projects.
The Vlogging, Blogging, and Learning stayed as areas.
For each of these area’s I removed the ever going projects. I moved all those todos inside the areas. Which means that all the projects are actual projects with a beginning and an end. This leads to a much easier overview of what is going on and what is in the pipelines.
Putting It All Together
Now that I have my tags, areas, and projects sorted out it was time to put it all together. For this, I use the planning functionality of Things.
Whenever I have a new todo I place it in the Inbox first. Then I review it and put the correct tags in place.
If possible I will add a start date and/or deadline to it.
Next, I place it in the correct area. If needed I will add it to a project or give it it’s own project.
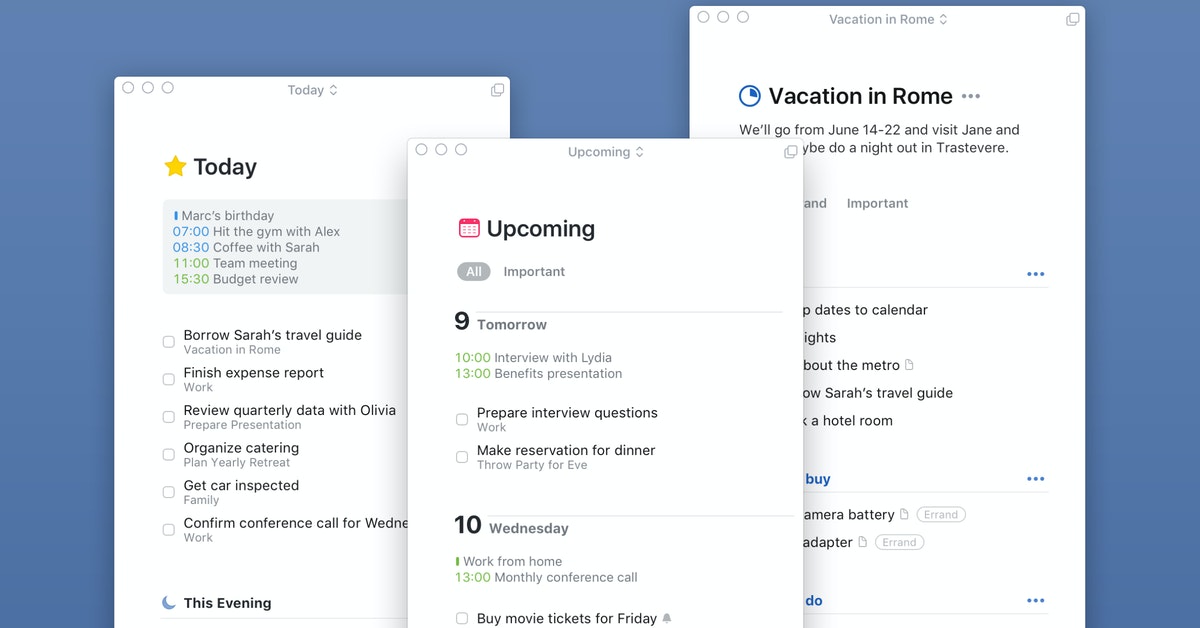
Things has a Today view. In this view, we see all the todo’s of which the start date is today or passed. We also see all the todo’s of which the deadline is today or passed. This gives a nice overview of what I should be working on today.
When I’m done with my todo’s for today I can go to Upcoming to see what is coming up the next few days.
If I want I can also go to Anytime and start filtering my todo’s based on my tags. This makes that I can work ahead on different tasks, finding the most important todo’s first.
Depending on how much time I have left I can also sort on the size of the todos.
Things has a nice guideline for this: Download the full Things Todo Guideline
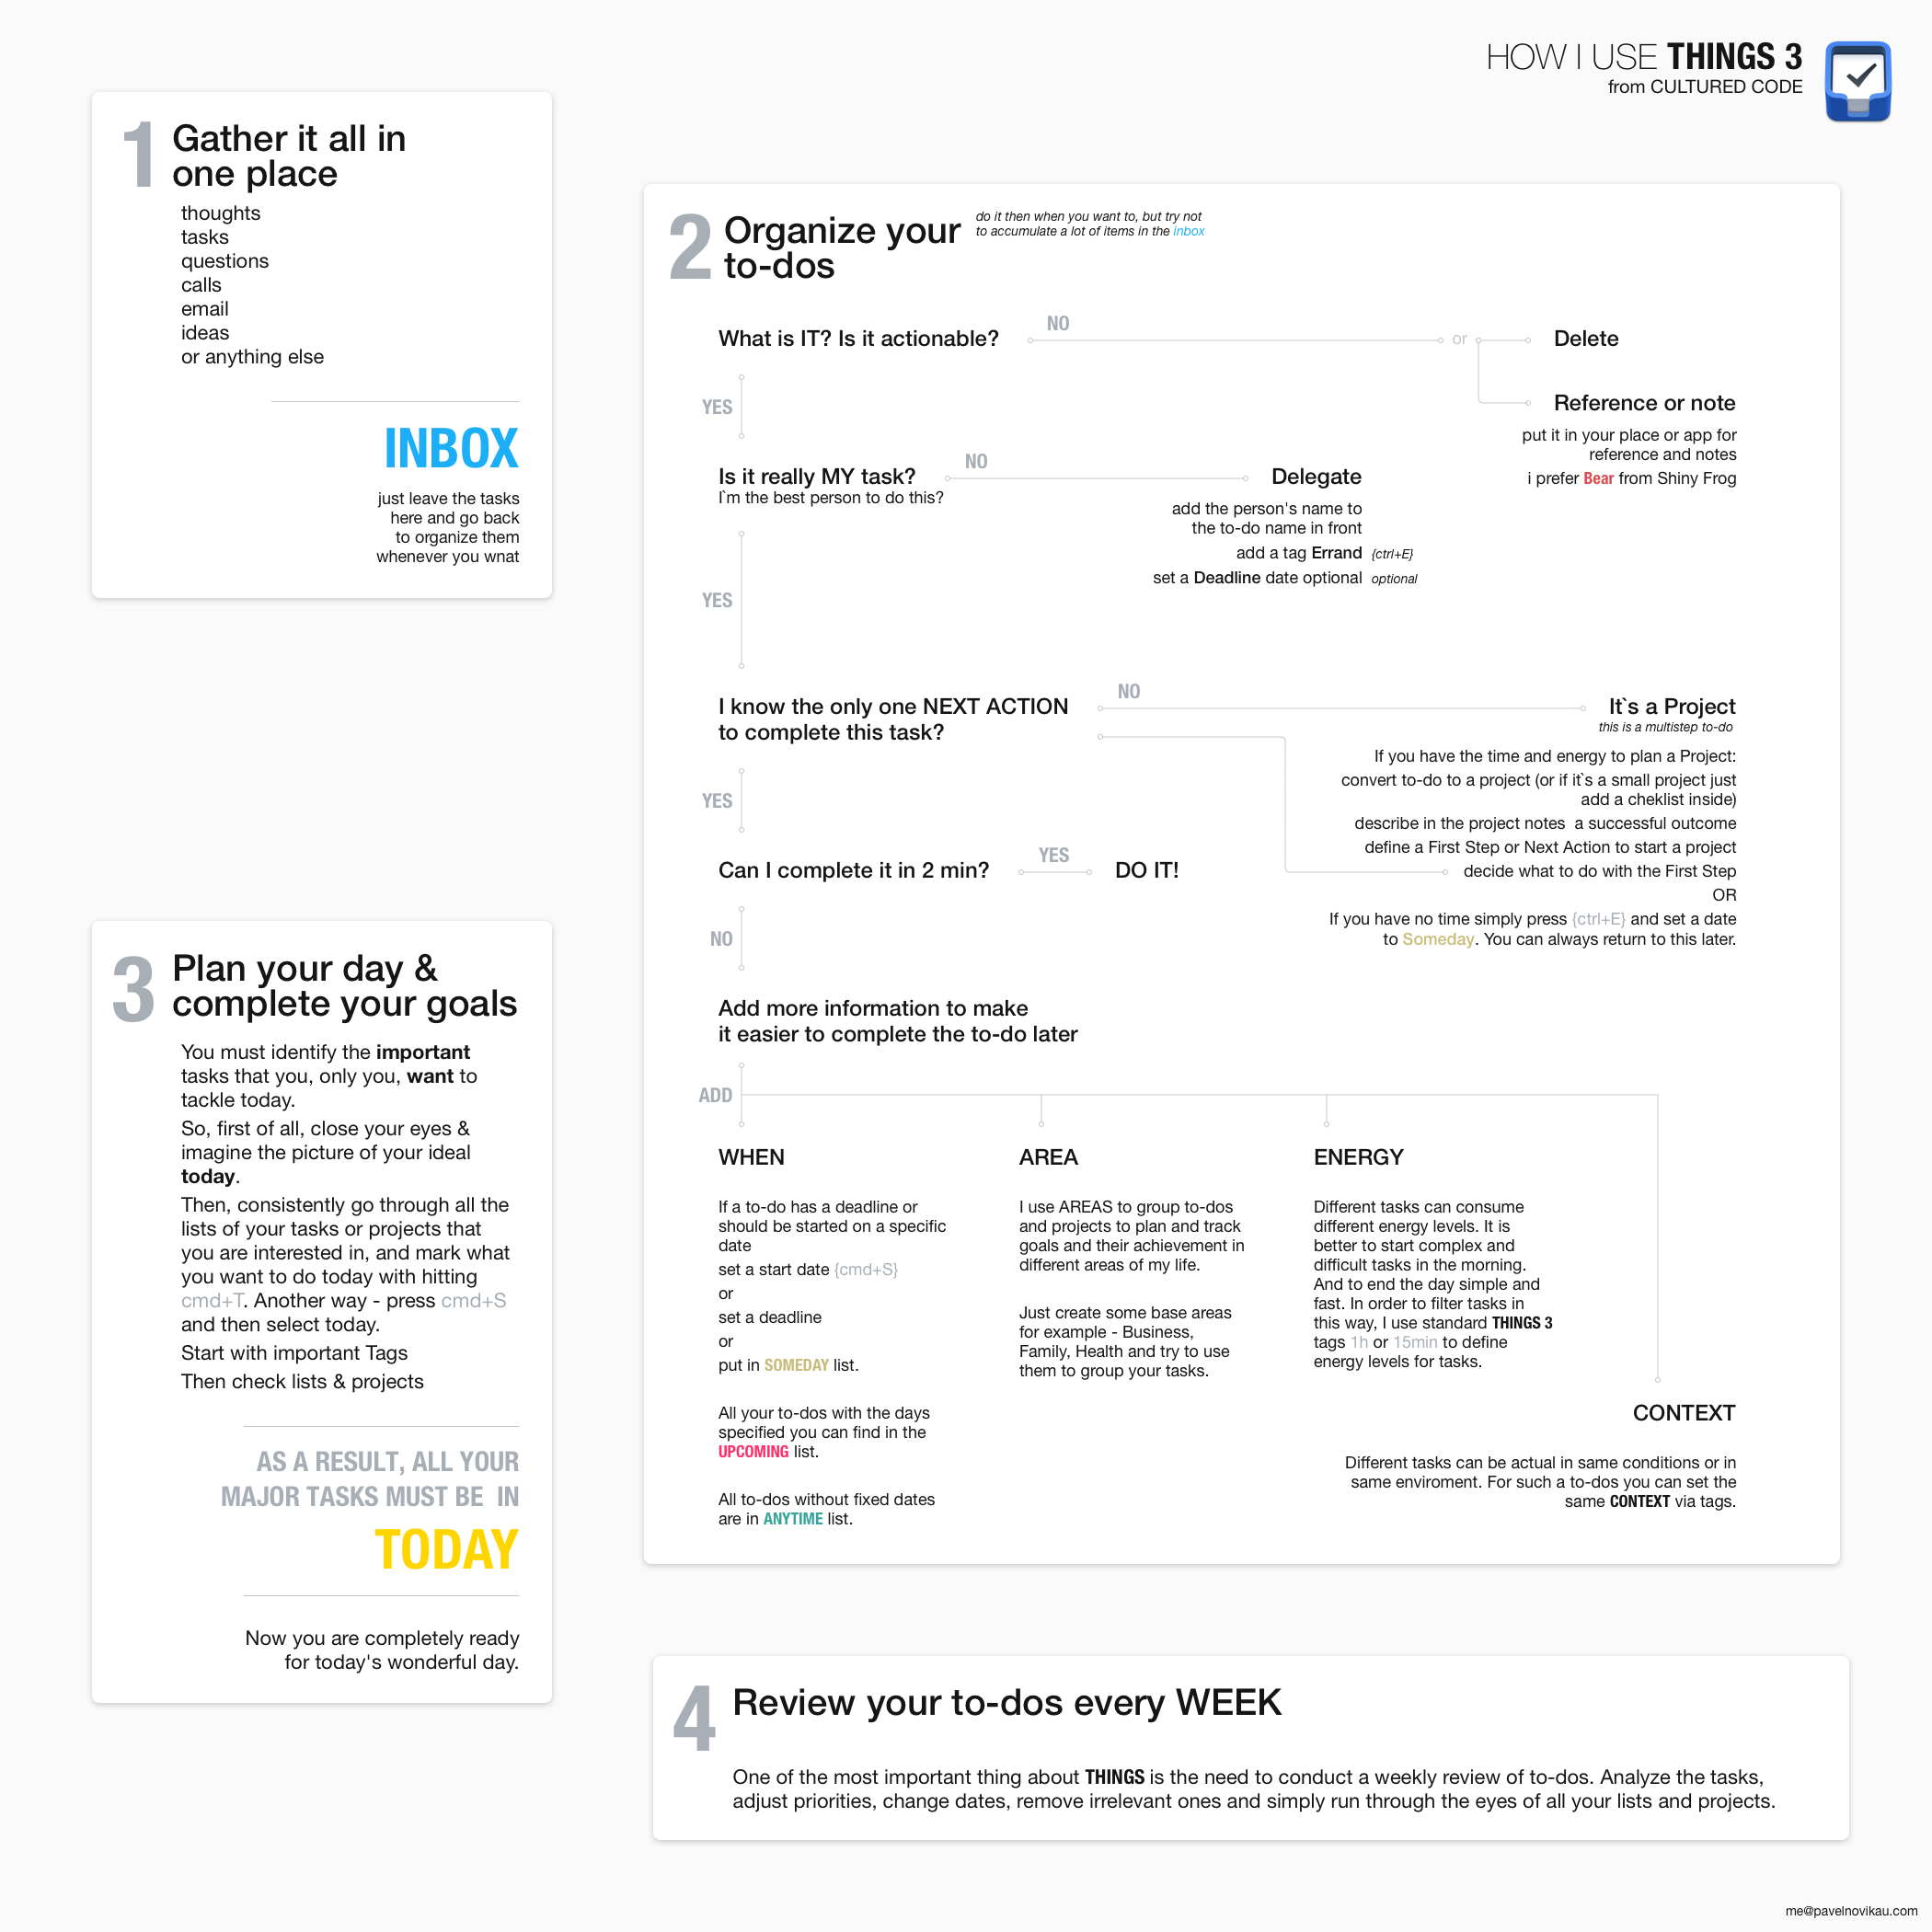
Sidenote
One of the pitfalls I use to fall in was that I thought I needed to finish what I started on the same day. I’ve since dropped that notion. This post, for example, stayed in my Today list for several days. The difference now is that I worked on this post a little bit every day.
This is because it’s not THE most important todo on my list but also because writing takes time. That is something that also applies to other todo’s.
So, don’t beat yourself up if you did not finish your todo list today. There is always tomorrow.
Conclusion
With this system in place, my todo list is doing the heavy lifting for me instead of vice versa. It is allowing me to more productive while working on the things that matter and fit in the time I have.
I hope this helps you as well to set up a productivity system that can help you. I realize that todo lists and managing them is a very personal thing. Everyone has a different way that works for them. But trial and error will get you there, so take of this what works for you and drop the rest!